Step 2: Start the Agent
Before we start integrating the LangGraph agent, let's understand how it works.
For the sake of this tutorial we won't be building the LangGraph together from scratch.
Instead, we'll be using the LangGraph constructed in the agent/ directory. It will
contain all of the logic we need to build our research ANA except for the CopilotKit
features, which we'll add together.
If you're interested in a step-by-step guide for building a LangGraph agent, you can checkout the LangGraph quickstart guide.
Let's walk through the LangGraph agent to understand how it works before we integrate it into the application.
Setup the .env file
Create and configure the agent's environment:
cd agent
touch .env
Add your API keys:
OPENAI_API_KEY=<your-openai-api-key>
TAVILY_API_KEY=<your-tavily-api-key>
Start the agent
Install and run the LangGraph CLI:
pip install -r requirements.txt # Install dependencies
brew install langgraph-cli # Install LangGraph CLI
langgraph dev --host localhost --port 8000 # Start the agent
This opens LangGraph Studio in your brwoser where you can visualize and interact with your agent.
The agent will be available at https://localhost:8000 for later steps.
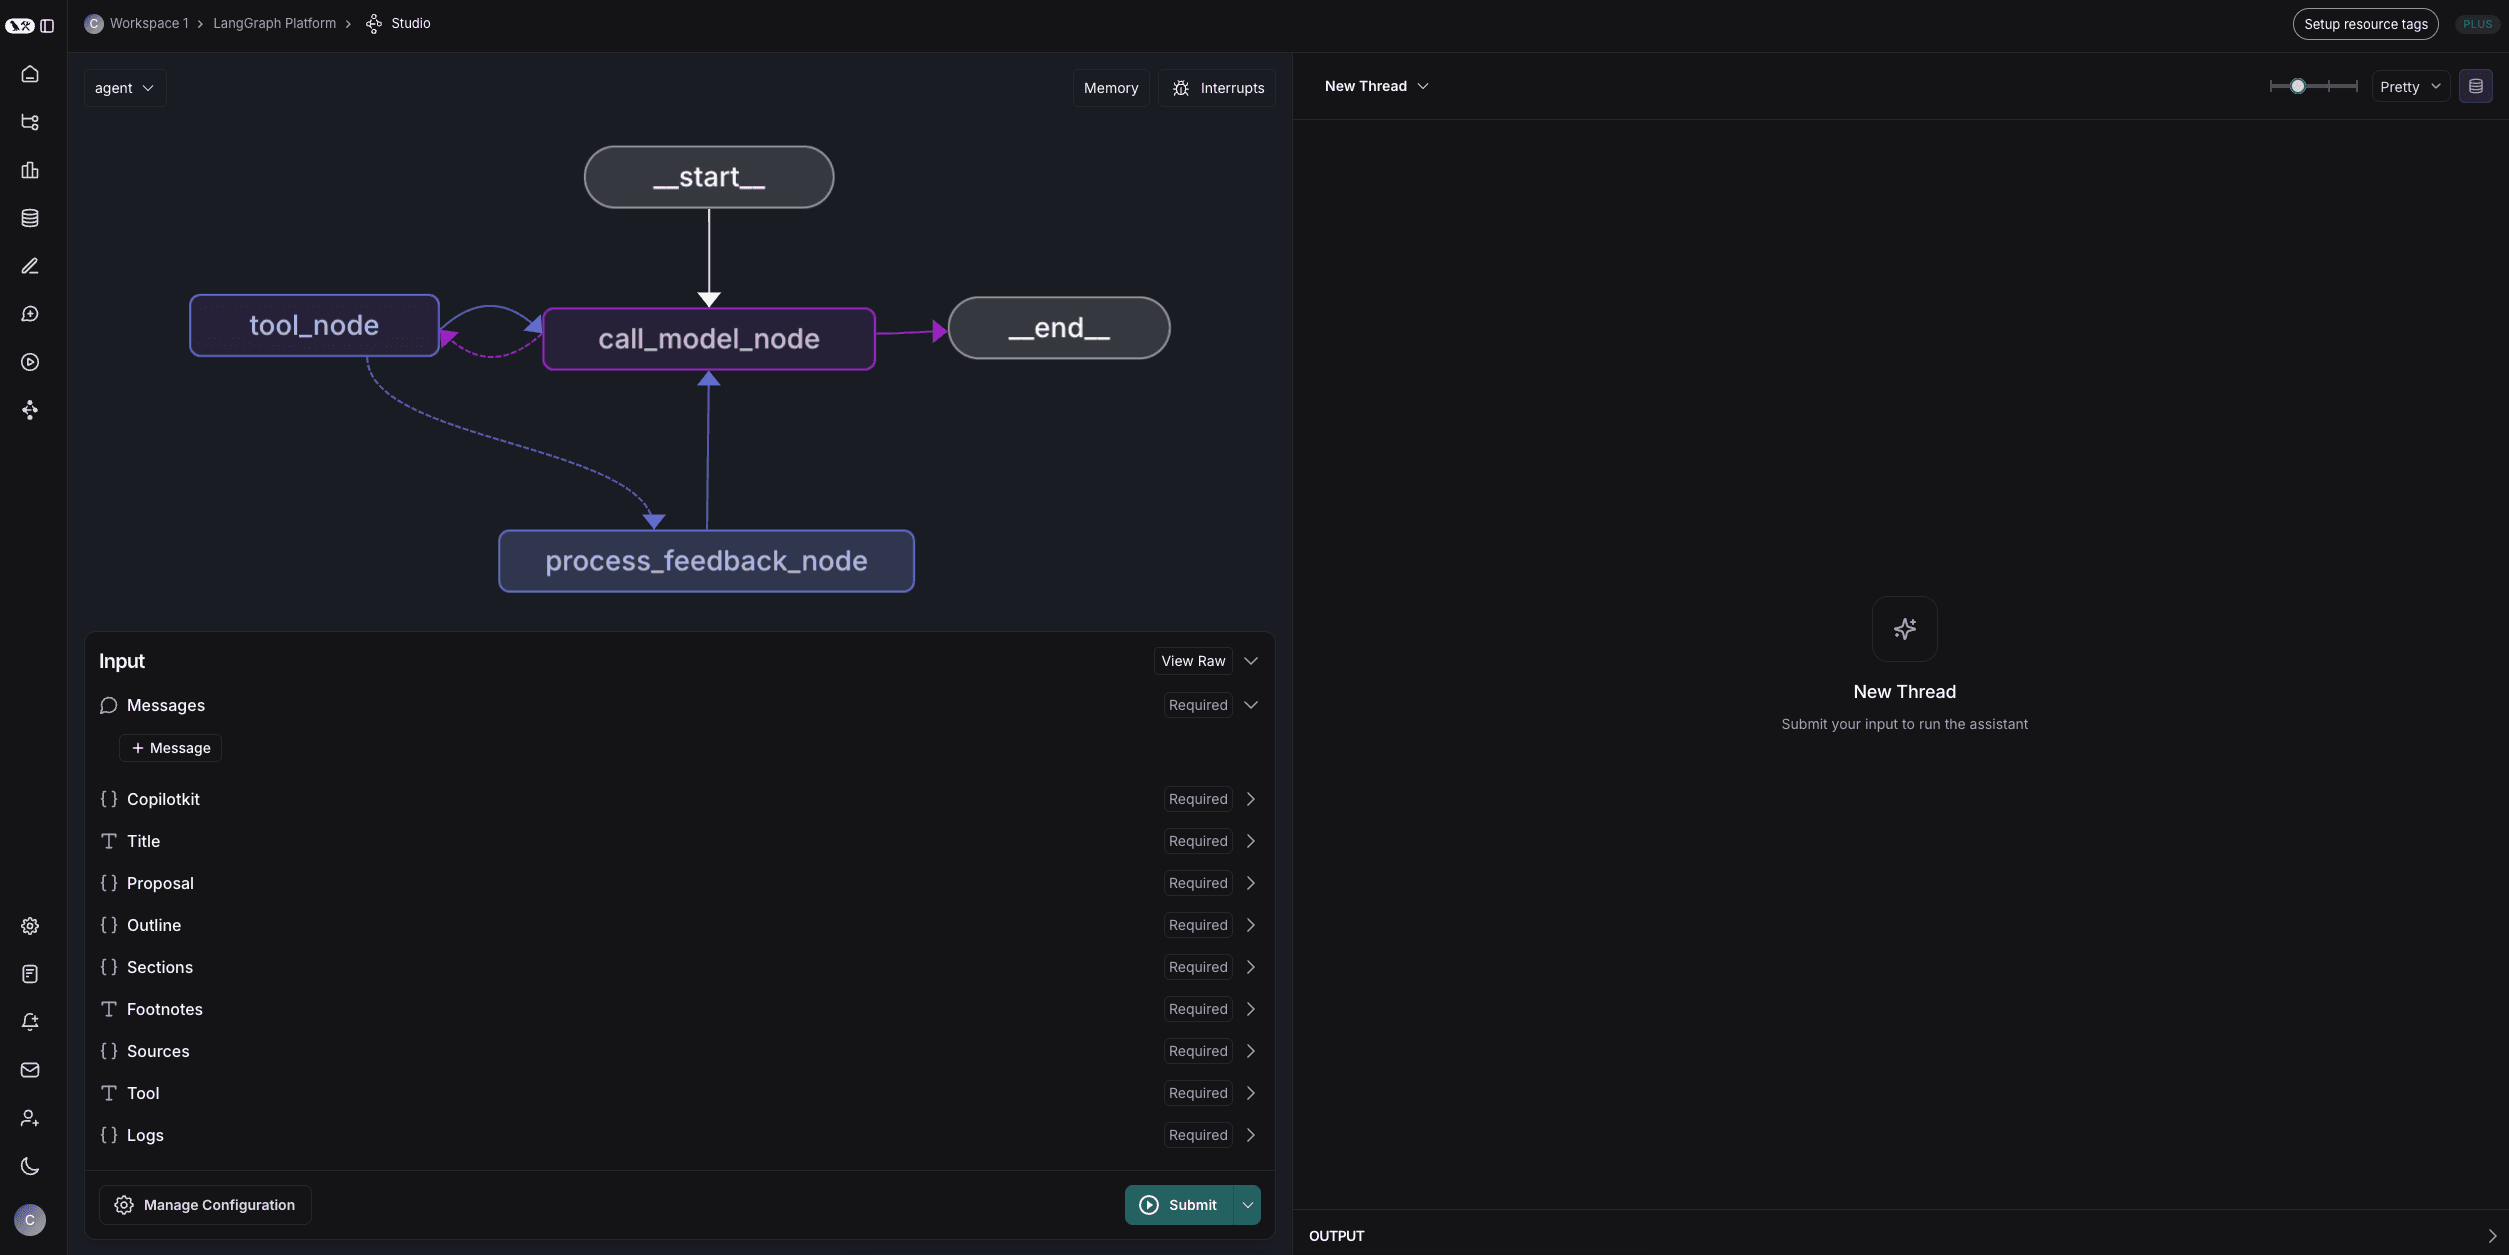
Understanding the LangGraph Agent
As we're building this agent into an agentic experience, we'll want to understand how it works. The key concepts at play here are:
- State: The state is the data that the agent is using to make and communicate its decisions. You can see all of the state variables in the bottom left of the screen. State will only update between node transitions.
- Nodes: Nodes are the building blocks of a LangGraph agent. They are the steps that the agent will take to complete a task. In this case, we have nodes for the agent, tools and human input and processing feedback.
- Edges: Edges are the arrows that connect nodes together. They define the logic for how the agent will move from one node to the next. They are defined in code and conditional logic is handled with a
routefunction. - Interrupts: Interrupts are a way to allow for a user to work along side the agent and review its decisions. In this case, we have an interrupt after the human node which blocks the agent from proceeding until the user provides feedback.
Testing the LangGraph Agent
You can submit a message to the agent by adding a message to the messages state variable and then clicking "Submit". This agent is paired
down for this tutorial and is meant to represent a simple research agent.
We'll be making this fancy in later steps, but for now you can ask it to do some research and see what behavior we'll be integrating into the application.
Recap
Now we have a running agent! It will be available at https://localhost:8000. Here's what we did:
- Installed LangGraph Studio
- Setup the
.envfile - Started, visualized and tested the LangGraph agent
In the next step, we'll be integrating the LangGraph agent into the application as a Copilot Agent (CoAgent).
